Recipes
DIY Oreos

There are so many ways to eat an Oreo. Some folks like to twist the sandwich cookie apart so that all the frosting stays neatly on one half — and can be scraped off with their teeth. The crunchy cookies are then savored individually. Others preserve the perfect cookie-to-filling ratio by dispatching the cookie in a few delicate, nibbling bites. And then there are the cookie monsters among us, who shove the whole cookie in their mouths and let the crumbs fly as they reach for another. Hedonists!
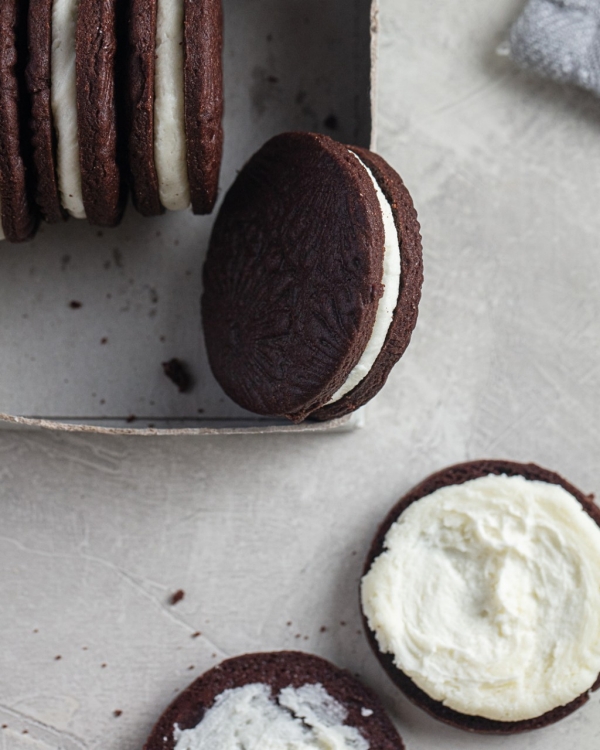
The test kitchen developed this DIY Oreo to be eaten all the ways, which is to say that its texture and flavor are spot-on for the Oreo lovers — and it’s absolutely scrumptious in its own right. Our pastry chefs also wanted it to be kid-friendly, so it comes together with all the rolling, cutting, and stamping of a Play-Doh project.
We flavor the chocolate wafer with Dutch processed cocoa and just a hint of coconut and vanilla extracts, so it tastes just exactly like it should — lightly sweet and very chocolaty. But the real magic is the texture: We use less sugar and butter than many cookies, so the dough is nice and firm and workable. You can roll it out thin and let the kids stamp it with all their favorite shapes, dinosaurs to letters, hearts, and flowers. It bakes up crispy but sturdy, like a cracker.
For the creme filling, we beat together white chocolate, butter, and confectioners’ sugar. It sounds a bit like buttercream frosting, but we rejiggered the ratios, so it’s got that dense fluffiness you look for in Oreo filling. It tastes lovely sandwiched between two chocolate wafers — or all by itself, if that’s how you happen to eat it.
Ingredients
For the chocolate cookies:
1 ½ cups all-purpose flour
½ cup Dutch processed cocoa powder, such as Droste
½ tsp fine sea salt
½ tsp baking soda
1 stick unsalted butter, softened
½ cup granulated sugar
¼ cup light brown sugar
1 egg white, room temperature
1 ½ tsp vanilla extract
⅛ tsp coconut extract
For the creme filling:
4 oz white chocolate chips
½ cup unsalted butter, softened
1 cup powdered sugar
Directions
-
To make the chocolate cookies: In a medium bowl, whisk together the flour, cocoa powder, salt, and baking soda. Set aside.
-
In a stand mixer fitted with the paddle attachment, beat the butter, granulated sugar, and brown sugar on medium speed until light, about 1 minute. Add the egg white, vanilla, and coconut extract, and mix until combined.
-
Sift the flour mixture into the mixing bowl. Beat on medium speed until the dough comes together and begins to form a ball, about 1 minute.
-
Turn the dough out, form it into a disk, and wrap it in plastic wrap. Refrigerate the dough until firm, about 1 hour.
-
To make the creme filling: In a microwave-safe bowl, heat the white chocolate chips in 20 second intervals, stirring between each, until melted, about 1 minute total.
-
Transfer the chocolate to a stand mixer bowl and let it cool to room temperature.
-
Add the butter and powdered sugar to the chocolate and beat on medium-low until smooth, about 1 minute. Transfer the filling to a piping bag and cut a ¼” opening in the bag. Set aside.
-
Preheat the oven to 350° and line a baking sheet with parchment paper.
-
Divide the chilled dough in half and return one half to the refrigerator.
-
Place the remaining dough between two large sheets of parchment paper and roll out to ⅛” thick.
-
Gently stamp the dough with your favorite cookie stamps, being careful not to push all the way through the dough. Cut out the cookies using a small, round cookie cutter and transfer them to the parchment-lined sheet, about ½” apart.
-
Bake the cookies for 10 to 12 minutes. When you pull them from the oven, they will still be soft in the middle and should not look dark on the edges. Let the cookies cool on the tray for 5 minutes, then transfer them to a wire rack to cool completely.
-
Repeat steps 10 through 12 with the remaining dough.
-
To assemble the cookies, pipe the frosting onto the flat side of a cookie, leaving ⅛” of the edge exposed. Top it with a second cookie. Repeat with the remaining cookies. Serve immediately or store them in an airtight container on the counter for three days.