Announcements
- Home /
- Announcements /
- How to carve a turkey
How to Carve a Turkey
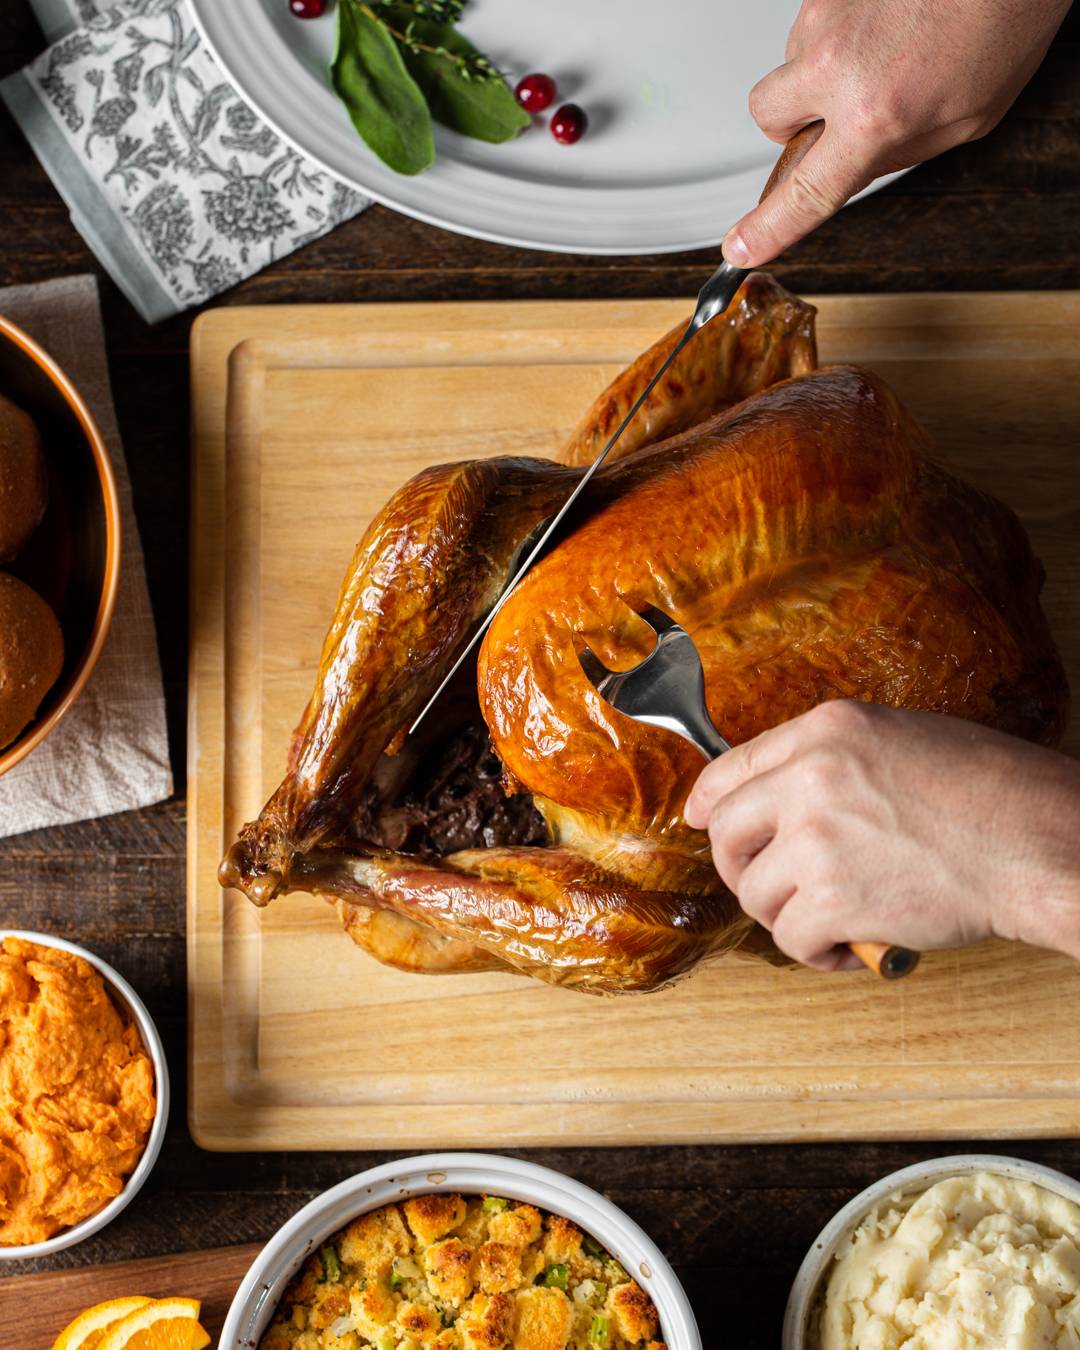
Most families have a designated turkey-carver at Thanksgiving — and the knowledge and skill set often lives exclusively in that person’s head. When they do finally decide to pass it on, it can feel like an intimidating rite of passage: you’re at the head of the table, knife in hand, and all eyes are on you as you make the first slice into that big, beautiful bird.
But the truth is, anyone can carve a turkey. (Well, anyone who can safely handle a knife.) In this guide, we’ll walk through the process step-by-step, so no one at the table will know you’re a newbie — by which we mean, they’ll be blown away by your deft knife work. Carved a turkey before but feeling a little rusty? This guide will help you brush up on your skills, too.
A few tips from our test kitchen before you begin:
Make sure your knife is nice and sharp. It’ll make the whole process way easier.
If the turkey is too hot to touch when you go to carve, let it cool a few minutes longer. It’s also okay to take breaks as you carve to keep your hands comfortable.
Removing the legs and wings from the turkey requires a bit of muscle, but don’t panic. Just take it slow, and keep carefully pulling and pressing as you slice downward (watch your fingers!). The legs and wings will come off — we promise.
Don’t toss all of the remaining bits of the turkey carcass once you’re done carving! Instead, divide them into gallon freezer bags and stash them in the ole icebox so you can make stock for all of your winter soups and stews.
And finally, consider adorning your turkey platter with garnishes, like fresh herbs, cranberries, and orange slices. Sure, it’s not really a carving tip, but it will make you look super chef-y — and your expertly carved turkey all the more impressive.
Servings: N/A
Ingredients
1 roasted turkey
Special equipment: a very sharp carving knife or chef’s knife
Directions
Remove the cooked turkey from the oven and let it rest on the counter for 20 minutes. The turkey will still be quite hot, so handle it with care when carving.
Transfer the turkey to a large cutting board with a lip or a towel to catch the juices. Position the turkey with the breast facing you and the legs facing away from you.
To remove the legs and thighs: Pull one leg away from the body of the turkey and place your knife on the crease between the leg and the body. While continuing to pull carefully, slice down behind the thigh and along the body of the turkey.
When you hit the joint, firmly pull and press the thigh downward until it’s loosened from the body. You might have to muscle through it a bit. Slice through any remaining meat, following the contour of the body, to fully remove the leg and thigh. Repeat with the other leg and thigh. Set both pieces aside.
To remove the breasts: Find the center “Y” bone, which runs along the top of the turkey’s chest. Place the blade of your knife just to one side of the “Y” bone. Slice downward and toward you, creating a deep, clean cut. Keep your knife where it is and slice downward, following along the rib cage. This will remove the breast completely while keeping the skin intact. Repeat with the remaining breast, and then set both breasts aside.
To remove the wings: Pull one of the wings away from the body of the turkey and towards you to loosen it. You might have to muscle through it a bit. Slice through the remaining meat, while pulling, to fully remove the wing. Repeat with the other wing. Save the wings and turkey carcass for making stock, if desired.
Place one breast on a clean cutting board. Starting from the narrowest end of the breast, on the diagonal, slice into ½” pieces, being careful to keep the skin intact. Transfer all of the slices to a serving platter. Repeat with the other breast.
Place one of the legs and thighs on the cutting board. Find the crease between the leg and the thigh. Slice along the leg until you find the joint where the leg bone and thigh bone meet. Carefully slice between them, separating the leg from the thigh. Repeat with the remaining leg and thigh. Place the legs on the platter.
On the diagonal, slice the thigh meat into ½” pieces, just like you did with the breasts. Place the slices on the platter.
Serve warm with your favorite sides. Enjoy!